


Here's an article about my latest RC Speed Car build, designed to break my existing Guinness World Record for the world's fastest RC Jet Car!
My previous jet car attempt in 2023 set an official Guinness world record of 94.76mph for the highest speed achieved by a jet powered rc car. There's an article I wrote here on that project, as well as one here written by Guinness World Records.

The plan was to build the new car in time for the UK summer speed events put on by ROSSA, the Radio Operated Scale Speed Association.
These events are some of the only places in the world where RC Car drivers can see just how fast their cars on an effectively unlimited stretch of flat, smooth runway, with proper timing gates and official time keepers.

After my previous attempt ending in a catastrophe, I was almost entirely convinced I would never build another jet car.
But then, I received an unexpected email from Richard Noble — the original land speed record holder who drove Thrust 2, the car my RC model was originally inspired by.
Very kindly, Richard sent me a book written by Thrust 2’s chief designer John Akroyd and inside he had written: “Now you can go much faster.”

Now I really had to give this another go!
My previous cars were all based on a single rc car chassis, an Arrma Limitless, which is a super fast electric powered rc car you can basically customise however you want.

Just like the last version, this car would be designed around a 220 size engine which can provide 22-23kg of thrust at sea level.

The car would also use the same wheels and suspension as before, taken from a brand new Arrma Limitless chassis Arrma sent over for this project - so thanks for them for this!
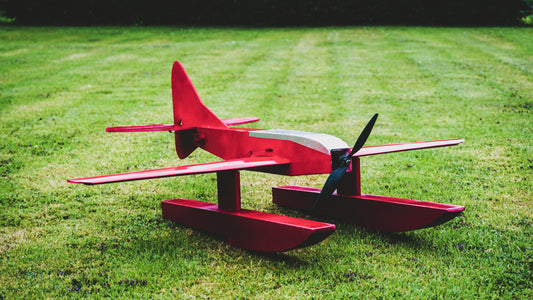
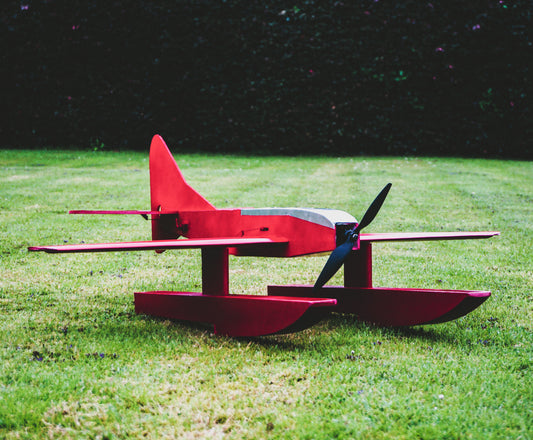
Now I could start to come up with a new monocoque design for the car that would be more aerodynamic. The concept I came up with was to actually go with a sleeker and narrower design with less frontal area than the previous car.

We moved the wheels to the outside to help with manoeuvrability so I could drive the car to the end of the track and turn it around instead of walking it down.
I decided to simulate the car with CFD, which stands for Computational Fluid Dynamics. For this I used a piece of software called AirShaper.

The car went through several iterations, steered by the data shown from the CFD.

Looking at the data that came back from the simulations, it was clear to see that the new car was just about better than the old car, and this would mean it would travel theoretically faster with the same engine at maximum power.
I now had a design, but it was going to be difficult to manufacture such a sleek streamlined shell for the car on my own. I knew just the people to ask for help - Easy Composites.

For those not aware, Easy Composites is a manufacturer and supplier of materials and equipment for advanced composites and have an incredible YouTube channel where they show how to make things like car parts, canoes and even UAVs out of carbon fibre at home.

They were definitely the right people to work with on this project, so after a few emails, I went to meet Paul at their headquarters where we could go over the design in depth and get started on the build.

Edwin, their resident aerospace Engineer, spent weeks going backwards and forth with me to develop a perfect CAD model to work from.
If the parts were at the wrong angles or too flat, like the intake at the front of the car, they might not come away cleanly from their moulds, so the intake, for example was made to be every so slightly curved to help with this.

Split moulds were accurately cut from a low density PU model board using one of the Easy Composites CNC Machines.

Next, these moulds could be sanded and sealed with Easy Composites XCR Epoxy Coating Resin, a resin I’ve used a few times before on other projects.

Paul then applied the carbon fibre into the moulds, joining each side of the moulds up with bolts before a heavier carbon cloth was added to the floor of the chassis and nose parts.

All of this process was done using the massive experience of Paul and the team and I couldn’t have managed anything like this level. A massive thank you to them for their huge contribution to this collaboration!
If you want to watch a dedicated 30-minute video on the entire process from start to finish, including how the resin infusion and vacuum bagging was done, check out Easy Composite’s video on their part of this project and subscribe to their channel for more stuff like this.
Finally the rolling shell of the car was complete, with the wheels and suspension installed, and all that Paul and his team needed to do was drop it off at the Project Air workshop for the final build.
Safe to say I was quite astounded at how good the car looked!

I had to get started on the build, and I had a lot of things to fit to this car, not least an actual working jet engine and all of it’s complicated systems.

So the first problem was figuring out how to fit the engine, but thankfully we’d designed it to fit perfectly well inside the aerodynamic shell.
With the fuel tank, pump and everything else required to make the engine run, though, space was going to be a bit tight within the car, and overheating was potentially going to be another issue.
I assembled the complete jet engine system on a board to be tested outside of the car which would then be simply fixed in place inside the car.

This engine is a 220 size, meaning it produces around 22-23kg of thrust and the car would only weight about 7-8kg, meaning the car would have a thrust to weight ratio of roughly 3:1!

At this point I could make a decision - go with this large engine the car was designed for, or downsize to a smaller engine that we could start of with to check the car worked at speed.
This was one of those moments where I’d make a sensible decision that would positively affect our chances of success and decrease our chances of the car being destroyed again.
The decision was made to swap to an 80 size engine.

I spent a whole day testing the engine, running tests and writing notes, to make sure I knew how to operate the engine inside and out while also checking a new small fuel tank and measuring how much fuel we’d have.

The radio gear needed mounting as high up as possible so it wouldn’t have interference from the road or carbon fibre shell, so this part was bolted to the the space behind the fin at the rear of the car.

Another important addition to the car was a skid tray, just like an F1 car uses to stop it from destroying the bottom of the carbon fibre shell.

I’d found sourcing a suitable jet pipe super difficult, but after a while of searching, I sourced an aluminium pipe that seemed to fit perfectly.
However, what I didn’t know at the time was the rapid heat properties of aluminium compared to steel, and in a hurry to get the car done, decided to mount the jet pipe on some 3d printed mounts.

Everything was coming together and we were nearly at a point where we could drive the car for the first time before the ROSSA event.

After powering up and doing a few laps down the street we saw the potential - this thing was a beast, with a highly powerful jet engine, breaking system and long range transmitter.


It was time for my next crack at a world speed record, two years in the making, but I have learned from my previous mistakes?
We would only find out at the runway - here's a link to that video.

If you enjoyed this article, check out other RC related projects on the article page here!
