


I built a jet-powered tracked hovercraft, a type of train that levitates to move along with almost zero friction.
It works through using a system of electric fans to compress air and direct it into specially shaped hover pads, while a miniature jet engine powered by real jet fuel is used to propel it down specially shaped tracks. Check it out below!
This was all inspired the 1960s tracked hovercraft hovertrain concept that should have revolutionised transport.

The Plan
Our Hovertrain would work similarly to our original hovercraft design. The hovercraft used a small fan on top to blow air underneath while inflating a skirt to trap the flow, allowing it to glide smoothly on a cushion of air.

Check out this Hovercraft video from a few years ago if you want to know more about how to make a DIY hovercraft!
Building the Hoverpads
I got to work designing and 3D-printing a hover pad with narrow slits in the base. This is to form a momentum curtain, an innovation made by the inventor of the hovercraft Sir Christopher Cockerell.

I held the lifting pad above a set of scales to measure the outward force it was exerting and I managed to achieve an impressive 500 g of peak lift.
With some more development, I created even more lift with almost a kg of peak lift thanks to a larger low pressure area.

Building the Track
To maximize lift, we needed to increase the surface area on the track. This required designing a track that offered a stable base for up to four hoverpads, doubling the lifting force.

We came up with an idea that used square pvc drainpipe as a structural base and then a laser cut plywood track screwed on top which included a guide vane for the train. With this track design, we could use four hoverpads with one at each corner of the vehicle.

We had a problem of how to make sure the pieces were all connected together and off the ground to keep them as straight and flat as possible. We chose to use several small tripods, modified slightly to optimally support the drainpipe track.

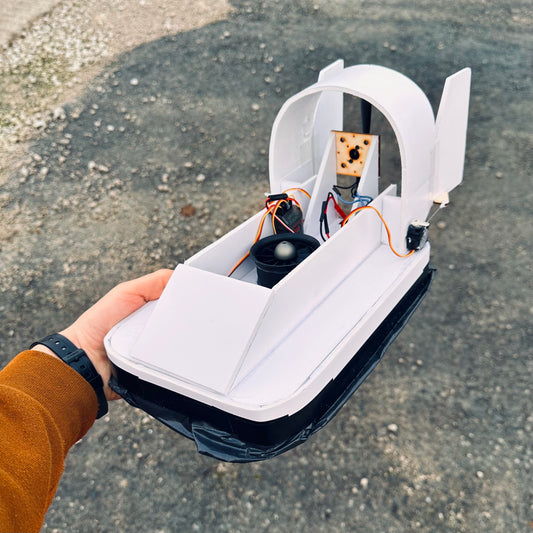
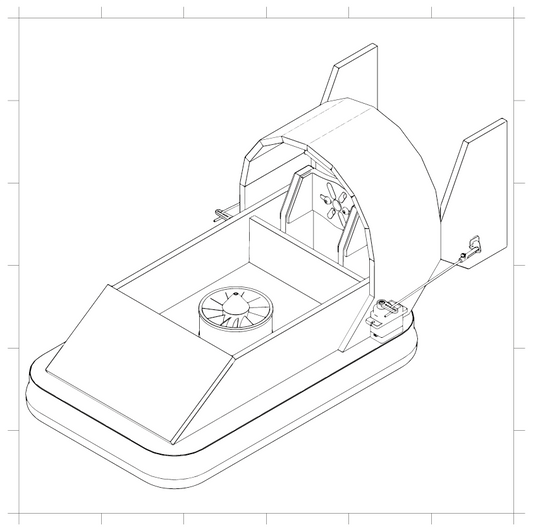
Building Hovertrain Prototype V1
I printed some more rounded fan ducts with a much larger base than before as well as getting four brand new high power electric ducted fans and fitted them to the ducts.

With the increased floor size, these new hover pads had a lot of power even at very low throttle settings.
I wired all four of these up to some RC electronics so I could control them remotely with an RC transmitter, which is a FRSky X20.

This chassis would need to have a special shape to fit over the central guide vain to stop it falling off!

To install the fans and electronics, all I needed to do was trace around each hover pad and cut a hole to fit each one.

Even when loaded up with its heavy 3s LiPo RC plane batteries, the hovertrain could float easily at almost any throttle setting and it had no problem going across mixed surfaces, even carpet as it simply floated right over it.

The prototype was tested on a piece of the track and it was a success.

Concerned about the central guide part of the track rubbing on the train, I experimented with some small hover pads that were fitted to the train so they could direct some air from the fans towards the central guide vain, and this seemed to work really well.

Propulsion and Jet Test
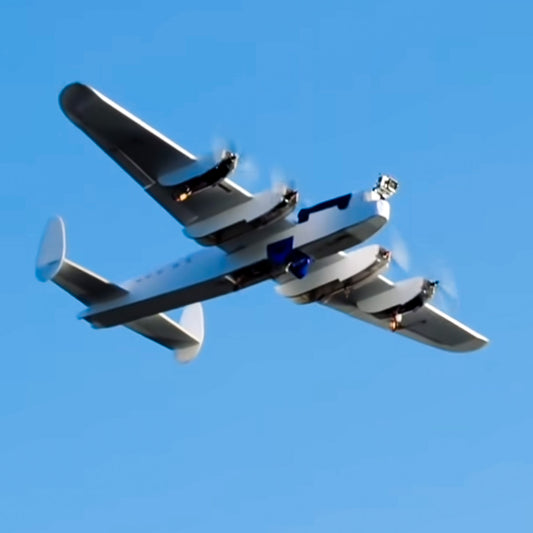
Now for the version two, which would run on our longer test track, we wanted to build a more substantial train with a jet engine propulsion system based on a tracked hovercraft built by the French.

We decided to base our train on the jet powered one as we thought it would be more exciting to use a turbine from a model aircraft, just as the real Aerotrain used a turbine from an full size airliner.
How an RC gas turbine works exactly like a real one, by compressing air, mixing it with fuel, and igniting the mixture to produce high-velocity exhaust gases, which generate thrust.

Before fitting it to the jet train, we first checked that all of its systems were working correctly and after a couple of minutes of running, we were satisfied that this micro jet engine would be safe to use on the jet train.

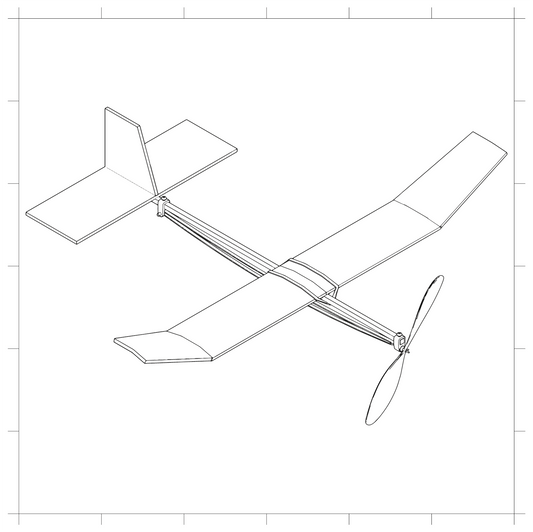
Building V2 Hovertrain
For the jet-powered Hovertrain, a stronger chassis was needed to support everything. I removed the electronics from the foam board chassis and laser-cut new parts from 6mm plywood.
We also reprinted the hover pads with properly designed separate ducts for the central pads, angled at 90 degrees. These were superglued together, and hot glue was applied to every seam to ensure they were completely airtight.

After a quick test, everything worked as expected and the centring hover pads were keeping the train from touching the track.
We moved ahead to the final part of the build which was to install all of the jet equipment, fuel tank made from a plastic bottle I got off amazon, and of course the engine itself.

I made a simple body from foam board, which is not the most heat resistant material out there, but its really quick to assemble.

Now with a bit of heat resistant paint added to each of the components, and all systems checked and rechecked, it was time to do our first full test run of our completed tracked hovercraft.

Testing and Problem Solving
With the fuel tank filled with a kerosene and engine oil mixture, we tested the fans and the completed 12m track.
Almost immediately, we noticed the masking tape used between track joints was being sucked up by the train. The cold temperatures were causing the tape to lift, and the fans disturbed it further. Adding extra tape seemed to resolve the problem for now.

Happy with the lift being generated and the track performance, we booted up the jet engine. Although the fuel pump was able to send fuel into the combustion chamber, it wasn’t igniting due to being just too cold.
The likely cause was that the jet fuel wasn’t being properly vaporised to mix with air at the right proportions for ignition.

I faced a similar issue a few years ago while starting a jet-powered hovercraft on a freezing beach. Back then, we improvised a fuel heater using a box and a flask of tea, pouring the tea into the box to warm the fuel container just enough to start the engine.

We knew all we’d need to do was do this again, so poured some hot water into a bucket and then carefully warmed up our fuel for a few minutes.
With that fixed, it was time to take this train to test again, this time with the shell.

We completed a few runs and I was starting to get used to the controls and confident in its stopping distances.
I was only running the throttle at idle power, meaning I wasn’t raising the throttle at all, instead I was simply letting the engine push the train along at its minimum setting as soon as I activated the lift fans to reduce to friction to zero.

I could accelerate faster at the beginning before killing the engine and lift fans mid run to slide the rest of the way, but I was a little concerned about crashing off the end of the track.

The next run we ran into more engine problems but realised the remaining fuel had just got a little too low and dropped in temperature.
After refuelling we could go again, but that unburned fuel in the exhaust ignited, instantly delaminated and melted one of the foam stabilisers which caused the train to lean to one side, catching on the track.

It was probably time to call it a day, do some repairs and revisit the project when I have access to more track but for now, the design was a success and we were happy with how far we'd got.

Make sure to watch the entire video here if you haven't already!
If you enjoyed this article, there are many other projects to check out over in our articles section.
Thanks for reading!
